How to Install a Pocket Door? 13 Easy Steps
Pocket doors are one of the easiest to install and a great space saver. Pocket doors are used in many homes because of their unique features. Not only they save floor space, but they also make a home look clean and tidy.
The door's mechanism is in such a way that it disappears into the wall when opened, thus saves space. Generally, people use them for closets and bathrooms, as the framing hardware within the cavity of the wall allows the door to slide in and out of the wall, thus rendering a proper space-saving solution. Here are some types of space-savvy internal doors for your home.
Steps To Install A Pocket Doors
For a successful installation, there must be room for the pocket door to travel inside the wall as the unit comes with a frame, and attached track, making it easy to install. In some cases, you may need to buy them separately and install them one at a time. The wall must be wide enough for the door, and it must be free of plumbing, wiring, or ductwork.
Let’s mention some of the important steps on how to install a pocket door. Some of the basic tools that are required to install a pocket door are:
- Measuring Tape
- Claw Hammer
- Standard Spirit Leveling Tool
- Drill
- Circular Saw
- Drywall Saw
- Flathead Screwdriver
- Nail Set
- Table Saw
- Pocket Door Frame
- The Pocket Door with Handle and Wheel Carriers
- Trim Head Screws
- Jamb Stock
- Pocket Door Hardware
- 2 x 4 Board
- Stud Finder
- Wood Screws
1. Buy a Pocket Door Kit
One can buy a pocket door kit from online stores or hardware stores. The pocket door kit contains the door, split studs, a track on which the door runs into the wall, and all the door hardware.
2. Inspect Your Wall Before Implementation
Before embarking on drilling and tearing down, check if there's enough room in the wall and if the wall can bear enough load or it can work as a partition. You will need to take temporary support while the door is fitted in such cases. A wall with pipes and electrical wiring is not ideal for placing a pocket door.
3. Remove the Existing Door, Before Fitting in a New One
If an existing door already exists, then you will need to get rid of it. With a saw blade, cut all the shims and remove the nails and then remove the door frame. Clear the opening and decide the exact space to install the pocket door. Do clear the clutter and obstructions too.
4. Remove the Drywall on One Side of the Wall
Next, the drywall should be removed a few inches above the header and thereafter follow the standard process on how to install a pocket door. Make sure that all the studs are in vertical function and the header is leveled so that the door rolls easily.
5. Cut the Exposed Studs Carefully
The already fitted studs should be properly cut with the help of a circular saw so that it makes some space for the frame. This step, if done right, will allow proper space for pocket doors to pass easily.
6. If Necessary, Make a New Header
Measure the header height, the length of the new door and the height of the soleplate. Then you can place a new header in the existing place. Use a circular saw to adjust the header and cut the studs that are sticking out.
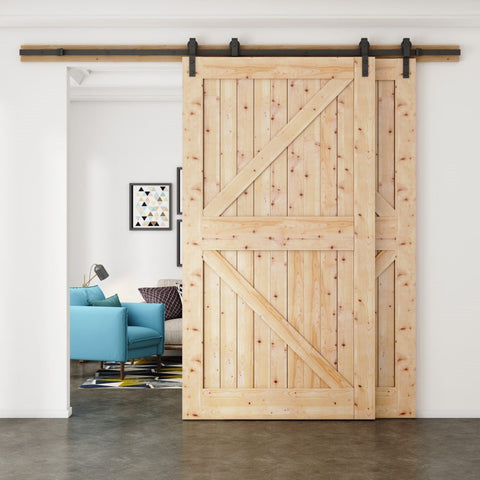
7. Install the Slider Track
After the header is placed, you have to install the slider track. Screw the brackets into the studs, and using a handsaw, make sure to level your track or else the pocket door won’t slide easily on the track.
8. Place the Door Into the Slider Track If Applicable
Mount the hangers on the top of the door to make the pocket door slide smoothly on the slider track. The hangers should be placed 2 ½ inches from the edge of the door. Once the frame is in its place, all the hardware on the pocket door should be screwed. Then slide the wheel hangers into the track and hang the door on those hangers.
9. Replace the Drywall With a New One
Still, there is some work to be done, so replace the drywall you removed at the beginning and according to the manufacturer’s directions, install the hanging hardware on the top edge of the door and adjust the hangers accordingly.
10. Install the Latch Hardware
All the pocket door kits come with door latch hardware. So, follow the instructions given and install the latch hardware along with all the door handles and locks.
11. Finish Installing the Drywall
Now finishing the drywall, you can tape and mud the drywall and then apply layers of the compound to make it smoother. Using construction adhesive and 1-inch drywall screws, install drywall over the door pocket.
12. Paint or Decorate the Wall As You See Fit
Paint or decorate the wall as you like, before you install the door trim. Because if your lines aren't perfectly straight, the trim will cover them right up.
13. Install the Door Trim
Finally, install the door trim with a screw, and jamb the door studs. Use 6d finish nails to install the top and strike the jamb casing to prevent any damage to the door. Your pocket door is ready for use. Here is a video on installing a pocket door.
Benefits of Pocket Doors
A pocket door slides into the wall, creating an opening and can be pulled to close if required for privacy reasons or to close the partition. There are many benefits of having pocket doors which are:
1. Maximize Your Space
For smaller homes, pocket doors provide floor space and also provide a perfect solution for closing off space when needed.
2. Make Convenient Connections
If you want to connect rooms without disturbing privacy, a pocket door can remain open during the daytime and closed for privacy during the night.
3. Provide Ample Privacy
Pocket doors are the perfect option to provide a sense of privacy for any home. When there is limited space, pocket doors can be kept open or closed, ensuring privacy as needed.
4. Create a Design Statement
One can use a pocket door to add a quality quotient for their home. High-quality pocket-door accessories and frames allow you to remain trouble-free and also give you the enjoyment to use the unique door option for many years to come.
5. Affordable
The amount of traditional hinged swinging door is slightly greater than the overall cost of each of the pocket doors. You will have some extra work ahead of you to accomplish your goal, but it's worth it in the long run.
Conclusion
Pocket doors need to be installed with precision and dexterity. Use the aforementioned points to install the doors efficiently and take advantage of its benefits in small and compact homes.